Tuesday 5 April 2016

... She lives

Electrics are pretty much done. I purchased a Mosfet ref/rec and all lights etc are done. Just indicators and oil pressure switch to go.


The child in me couldn't resist. After fitting a new rear tyre I fired the bike up and confirmed that it was charging. Tacho is now working, and all lights other than indicators are also working. Grounding the oil pressure switch feed also confirms the clocks show the oil light. So there was nothing really stopping me running the bike up to temperature and scooting off down the street for a quick 1st ride. 


I'll be booking the bike in for set up time in the near future :o)

Monday 21 March 2016

Update time again

Lots been happening at Chez Oliver and the bike is really coming along.


I have been doing a lot of sitting in the garage recently, thinking through some of the things that need doing .... the exhaust had been bugging me. Now that the rear hangers are gone, how am I going to mount it. Epiphany moment .... the current built in mounting plate will have to go. So the angle grinder will come out. I will then use the centre stand mount to provide a brace underneath the bike, so we get that nice clean line without some horrible Heath Robinson affair holding the end of the pipe. I may even just change the angle of the rear pipe ... I had a play with photoshop to see what it looks like.


Exhaust hanger chopped off - and exhaust remounted. Had to make a hanger from the centre stand mount. Not happy the bolts are long enough into the head securing the exhaust headers. But will be fine for a test fire up.


An OSS member was kind enough to send me some 3Ohm coils when I discovered the mismatched pair on the bike. However when I fitted them they were arcing to the frame, as the insulation round the HT has failed. So the coils are still mismatched at present. Need to budget for eith a second-hand Dynacoil - or buy a new pair!


Electrical wire arrived. Some wire extending done. Components all in place. Temp ignition barrel in place. Needed to extend the starter motor cable up to the  starter solenoid, and place all obvious earths, then there was a few wires to sort out into the reg/rec (still not done)... and some floating about that I needed to trace / check on circuit diagram but horn was wired in, and we'll leave the indicators, and what I think is the side stand switch. So just the main lights and brake light to go.


Possible test fire this weekend I thought? Well all the electrics needed were in place (albeit on a total loss affair with no charging). The bike cranks OK so just need fuel.


Well fuel was purchased, tank was filled, and the battery was tasked ..... and ..... nothing, nada, nowt! Sparks sparking, kill switch not the problem, wiring checked and double checked ... Mmmm must be fuel.  A quick check showed no fuel flow. So I drained the tank and removed the fuel tap to have a good look. I discovered it wasn't flowing fuel from any position. Nothing seemed wrong, the diaphragm is intact, the position switch works. But still no fuel when placed on "prime. I'm pretty sure if fuel isn't reaching the float bowls it isn't going to fire - bugger. Beats me - as all said and done for such an old bike the filter looks clean as a whistle. Of course now that I have taken the tap off, the damned seal (bloated with age) won't seal again .... Given I have flat slides, and there's no obvious take off for the vacuum feed I was planning on just running the bike with the tap set to "prime" which should bypass the daphram which opens only when a vacuum is created by the connection to the carbs.


So I thought about trying to run a container as a fuel tank with a pipe heading down to the carbs ... but I decided having combustible liquids sloshing around in an open container was stupid even for me! So dismissed the idea and headed indoors after a quick check again of the electrics - I managed to work out which of the wires coming from the ES gear position sensor was neutral - a simple case of testing continuity to earth of each of the wires coming from the ES engine when in neutral. So plugged that one into the loom, and hey presto we have a green idiot light which goes out when any other gear is selected. Have I mentioned how much I hate electrics? I'm now upgrading myself from chief electrical numpty to electrical numpty designate on account of the fact that I worked that out all by myself with no adults present :O)


So ... pingle fuel tap ordered which should arrive in a couple of days ... and hopefully we'll hear the engine for the first time.

Saturday 27 February 2016

Bit of an update

So this is where we stand. Since the last update we have

  • Chain and sprocket alignment
  • Rear shocks spacers and bolts sourced and fitted
  • Footrest hangers fabricated and fitted 
  • Additional frame bracing to headstock added
  • Brakes and gear linkages connected
  • Clutch checked and new cable fitted
  • Front wheel bearing support fitted
  • Rear brake torsion bar fabricated and fitted
  • All engine mounts in place
  • Coils (albeit two different ones) fitted
  • Exhaust gaskets sourced and exhaust test fitted 


That's a period Harris exhaust being test fitted. Pretty sure it will work ...

... and that's the Mikuni VM29SS flat slide carbs of a Slingshot GSXR750. Should be enough for the 1100 motor for now. If we tune this motor then we'll need something a little more meaty.


Not sure next steps just yet:

  • Spotted and issue with the carbs that needs solving
  • Exhaust hanger needs fabricating
  • Electrics need laying out with under-seat placement.

Saturday 13 February 2016

More frame mods ...


The hangers have been mostly fabricated ... not finished yet, but well underway ....


And the bottom engine mounts are now also finished :o)


Monday 1 February 2016

Ultrasonics ... it's the future!

So this is what we started with:


At first look they didn't look too bad .. and I considered just sticking them back on the bike.

However - on close inspection they were in dire need of a refurb.

The Carbs are all now separated - had to do battle with a damned cotterpin - it's amazing that in a garage full of tools I do not have anything obviously just the right size to drive out a cotterpin. Anyhow in a true "Heath Robinson" moment I lopped the point off a panel pin, and it was a perfect fit. A couple of taps later and Carb 2 and 3 were free of each other.

All the rubber elements of the carbs are perished beyond reuse. To say they were manky is an understatement. If these carbs did any breathing in their former role, then they probably sounded like a 90 year old miner with a 60 a day Capston Full Strength habit! 

Once each were free from the other, I can take my time with one at a time. So with the help of a mini mole grip to loosen stubborn screws, I dissembled into separate numbered bags, one carb in bits was placed into the loaned ultrasonic cleaner (thanks Neil). Well bugger me sideways with a broom shank - convinced it wasn't doing anything I took the main carb body to the sink and watched as a bit of degreaser and tooth brush worked magic. Half an hour in the ultrasonic bath and the dirt is loosened well enough. The cleaner isn't going to miraculously make old pitted metal look polished and new, but they do loosen things up that you can finish the job with a little water and degreaser.


Quite pleased with that result ... before and after comparison.

Still the carb tops to paint and a bit of extra scrubbing of the connector rails, and I need some new float bowl tubing. 


... an finally got round to painting!


Thursday 28 January 2016

Anything to avoid carbs and electrics

I rather like working on bikes. That is as long as that does not involve fiddly or plain complicated! Carbs and electrics do come under those categories.

So in heroic efforts of procrastination I have continued to bolt bits together, test fit, grind frame lugs, and have added brakes, under tray, seat catch, rear light and have started to worry that I can no longer procrastinate!!

Under tray from Lucky 7 - another front plate to fit, but requires more lug removal


Really does tidy up that rear end no end!


Accossato front mastercylinder, Goodridge hoses, and a set of 4 pot Nissan calipers will provide retard forces to the bike.


A little bit of Yoshimura was needed!


Starting to come together!

Sunday 24 January 2016

We have the engine in the frame

Blimey - what a pain in the arse large weighty engine blocks are. There was no way in this world I could have done that by myself. So big thumbs up to Neil who stopped by to eat Haggis, drink whisky, and curse with me as we attempted to mate the engine to the frame with a hangover.

In the end we had to take the cam covers off as the bracing added to the frame just, and I mean just, gets in the way. The half centimetre taking the covers off really makes a difference. It then required us to remove the swing arm and forks, lay the engine on it's side, and lower the frame over the engine. The oil needed changing anyway - it escapes quickly when there's a gapping hole to pour through :0)

Next challenge was getting the swing arm back in, and tougher still the forks. Although it helped just luring the bike on it's side again. 

So - we are missing one RHS engine mounting plate, and the two bottom plates will need making up. 


Definitely starting to look the part. 


Saturday 9 January 2016

The nature of building specials ... buying more stuff.

So Christmas is over. I had a few days spare where I could possibly spend some time in the garage. The best laid plans and all that!! Man Flu! I have been off work all week coughing and spluttering.

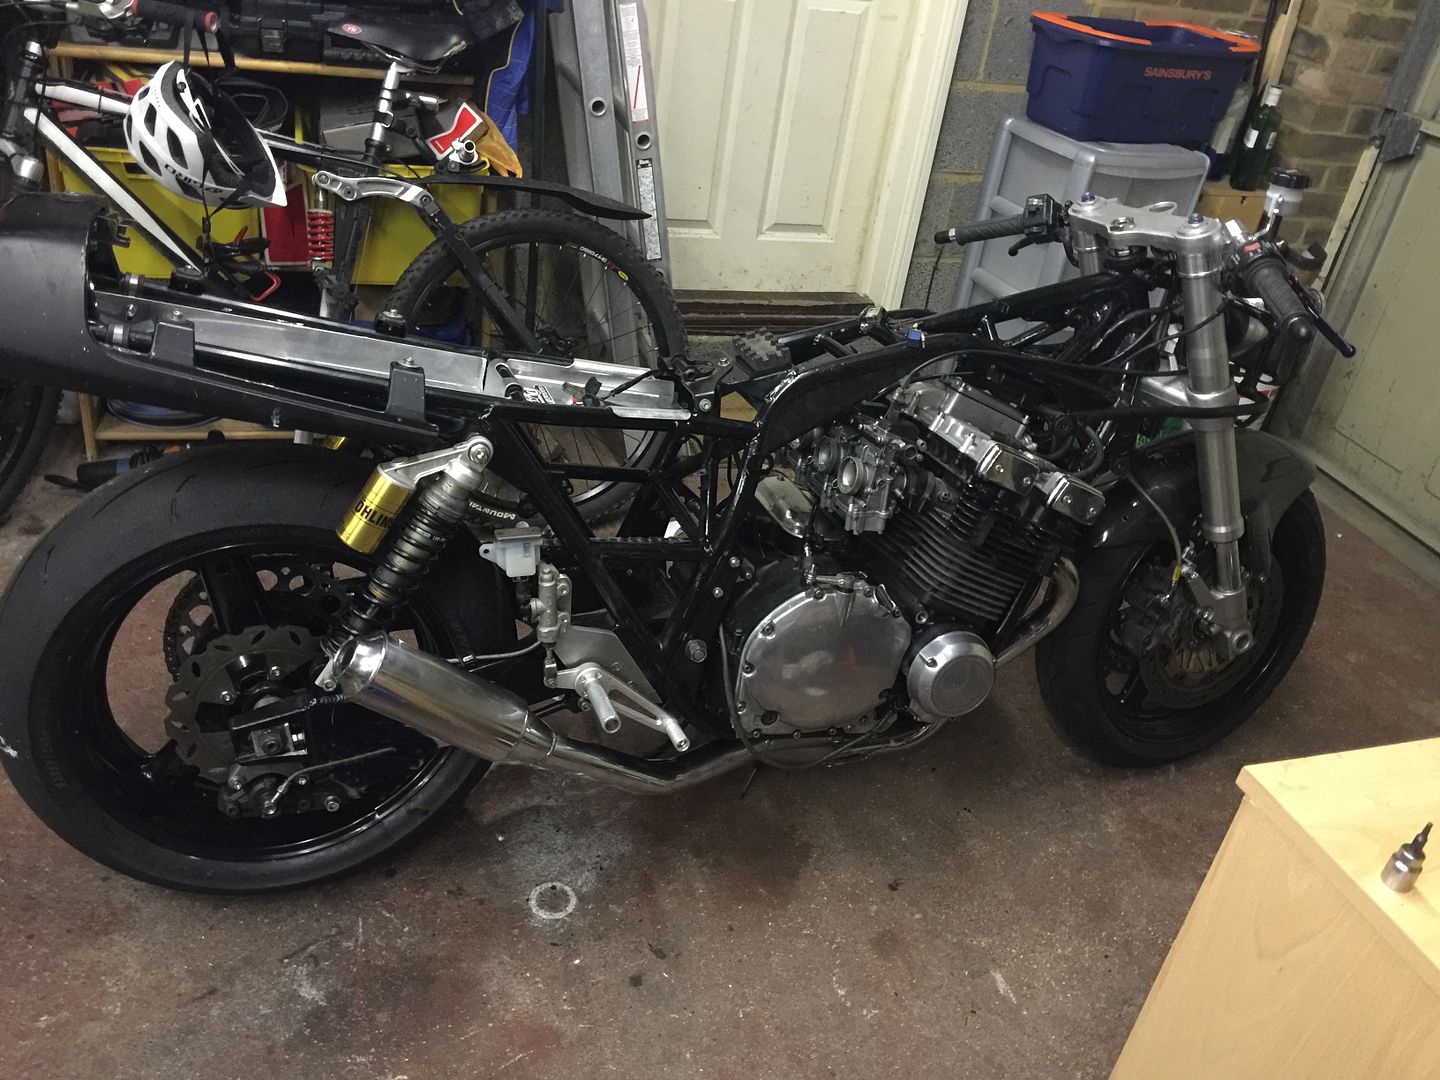
I have been deliberately avoiding eBay ... we need to not buy things, but use what we have. However, there are some things I did need, necessitated by the swop to the TL1000s forks.

I had ordered some clipons from "intobikes" - Harris 50mm risers which should lift the clipons just enough to sit flush with the upper yolks. However, the Christmas break delayed the order acknowledgment, then I assume they delayed the order, then Harris confirmed  they had no stock and wouldn't fulfil the order for 3 weeks! Damn it!

I have a TL1000S front mudguard on the way - eBay special. Add to that I ordered some paddock stand arms from eBay to go under the bandit swingers so I can get to work with the bike off the side stand. I always had buttons when racing so needed the new ones to fit to the old stand. Only they were too big. That said the paddock stand has been drilled to accept the new arms. So that's solved. Only I didn't have a drill bit big enough as the diameter was larger than my drill will take - thanks Cambridge Motorcycles again!!!

Did I mention I have a million and one "old" bolts? This may be the case, but I certainly didn't have any for the front and rear brakes, or disks. Well some shiny new bolts have been sourced from Pro-Bolt. Oh and I bought some eBay sourced M4 and M6 bolts ... just because I need some for the carbs and ancillaries.

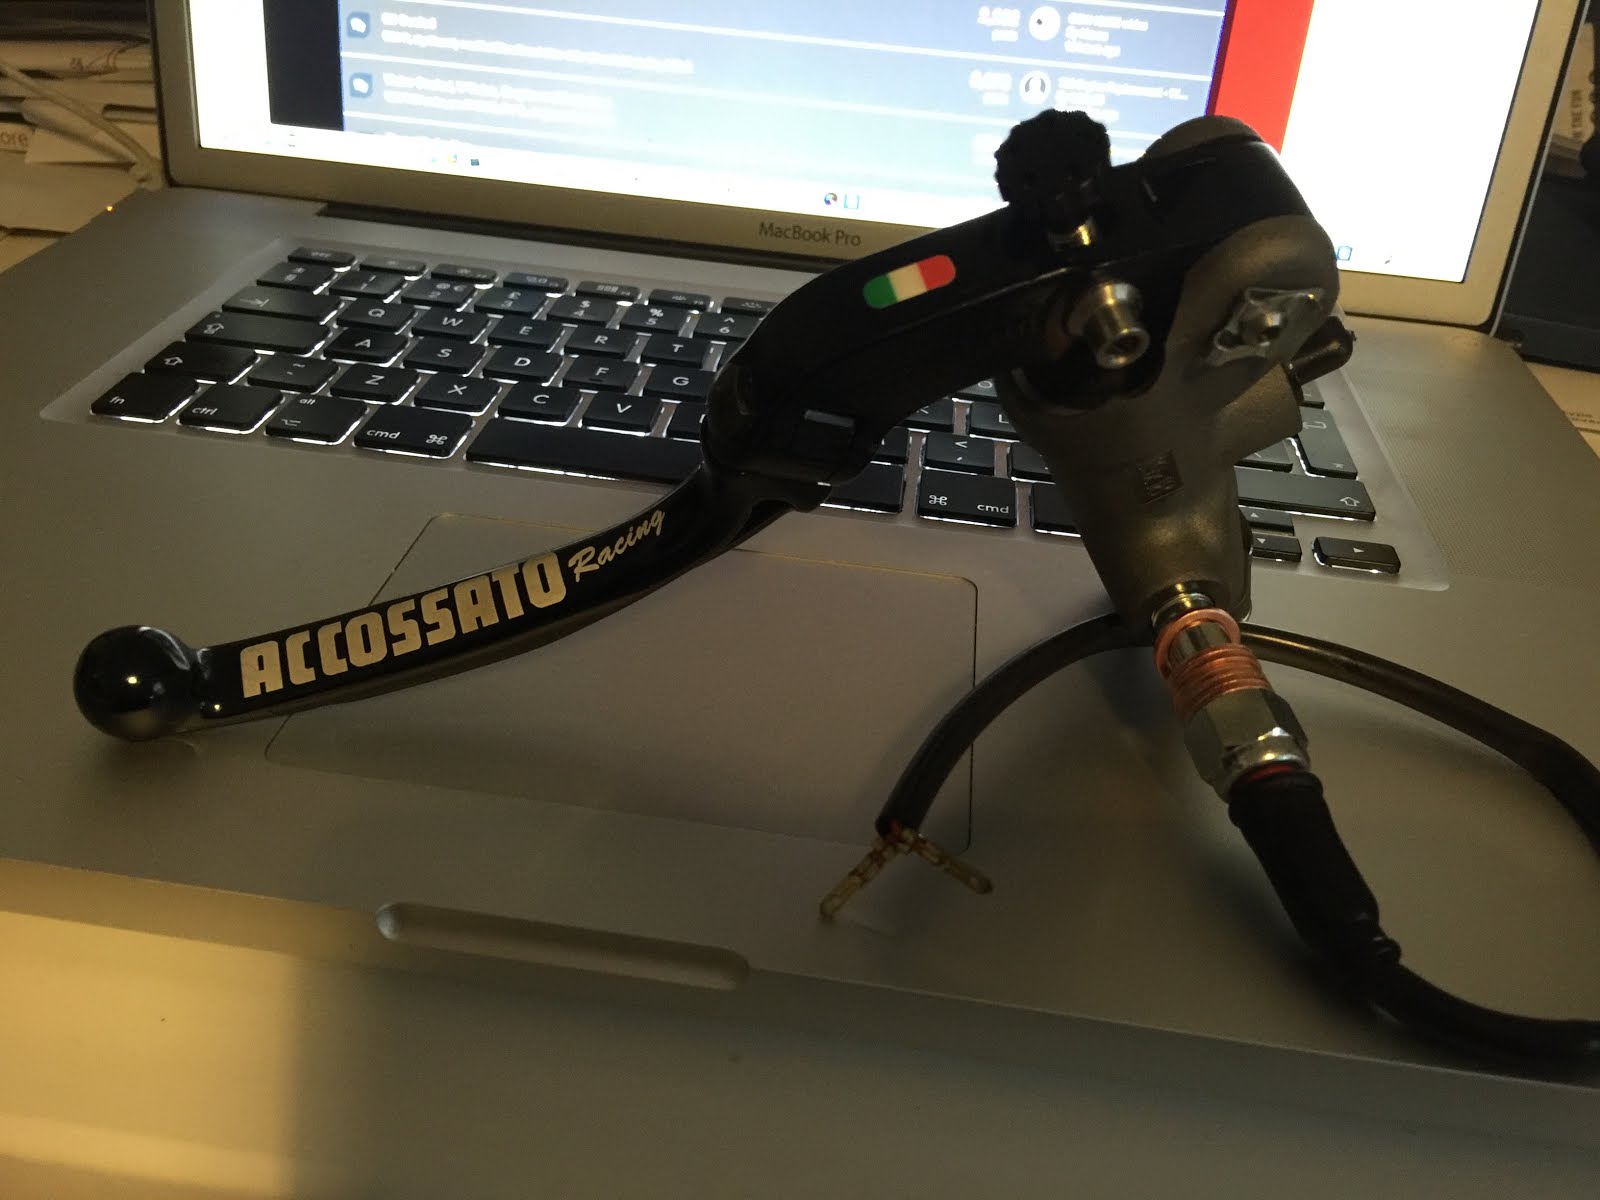
Oh .. and this arrived ... sorry I was weak!


I love it when the postman arrives with bits. There's a matching cable clutch lever for the other side and a bracket for the reservoir.

Some real work on the bike has to start soon!


So we are just waiting on clip-ons for the forks to arrive from Harris via intobikes - should be here next week, then I plan on getting the brakes and running gears sorted. I have a ultrasonic cleaner coming weekend after next (on loan from a mate on promise of Haggis and Whisky in exchange for loan) to clean carbs (socket head bolts waiting to replace the existing flat head screws) .... then it's engine in and confirm sort out rear wheel alignment. Undertray from lucky 7 should be on the way in the next couple of weeks.
With engine in, anclilairies fitted running gear sorted, undertray fitted, I can do a few things :
  • mark up the frame to decide what else can be deluged,
  • Try and get the engine fired up,
  • Make a decision on the rearsets and source
Onwards and upwards

Thought I'd start looking at test fitting the front light bracket and fairing today. Mmmmmm ... some fairing trimming and lug removal required to fit round the forks. They contact the front lugs on the front bracket - can't see not connecting the fairing there would be too much issue, and perhaps moving them and re-drilling the fairing further to the front might be an option if it is.

Also had a bash a fitting the chain rubber protector over the swing arm!! Would be interested in knowing how other's have done that. The bandit chain rubber guard makes it impossible to put the swing arm back in. Need to look at that one again!

Also sorted out the rear wheel, so that all inner races are now in the wheels. Couldn't fit the rear brake stay as the 180 tyres that's in the fouls on the stay.

All in all a few hours finding out other jobs that need doing!!